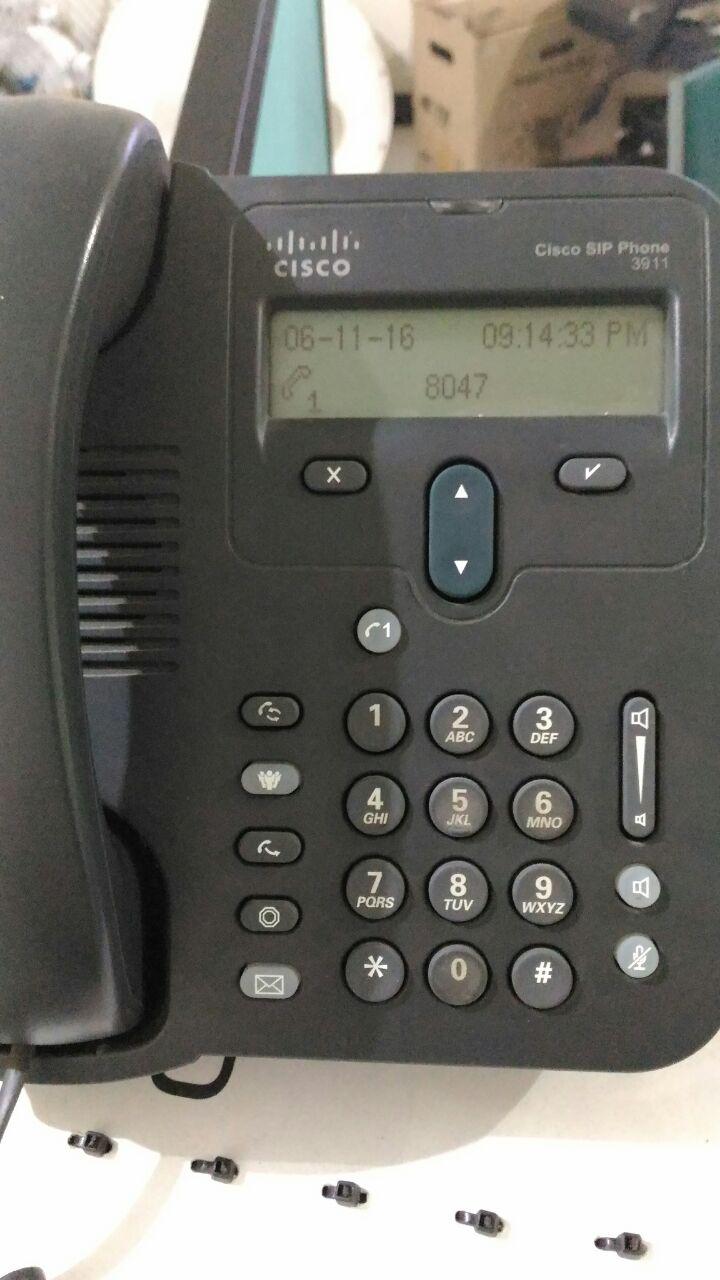
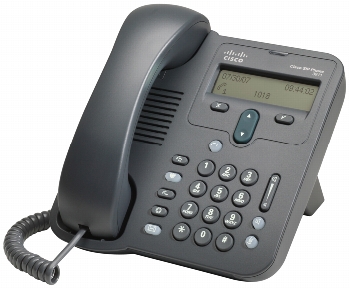
Latar belakangnya adalah, seorang teman membeli ip phone Cisco 3911 dengan harga murah di toko online, dengan harapan bisa dipasang di kantor dan tersambung dengan IP PBX Asterisk based. Sayangnya, ip phone tersebut sebenarnya IPT untuk Cisco Unified Communication versi 6 atau 5. Halaman web ui ip phone tersebut hanya mencantumkan status network dan tidak ada entry untuk memasukkan informasi user/password maupun alamat registrar.
Berikut ini cara menambahkan ekstensi 8047 ke Elastix yang memiliki ip address 172.16.1.16:
- install tftp-server, tftp dan xinetd di Elastix jika belum ada. Tapi selama ini di instalasi Elastix otomatis sudah menyertakan tftpserver dan xinetd.
- Upload file BOOT3951.0-0-0-9.zz, DSP3951.0-0-0-2.zz, SIP3951.8-1-4a.loads, SIP3951.8-1-4a.zz, dan XMLDefault.cnf.xml ke direktori /tftpboot.
- Edit file sipdefault.cnf di baris berikut lalu upload ke direktori /tftpboot.
[stextbox id=”grey” shadow=”false” color=”FFFFFF” bgcolor=”000000″]
…
proxy1_address: 172.16.1.16
…
outbound_proxy: 172.16.1.16 ;
…[/stextbox]
- Edit file SEP<macaddress>.cnf.xml di baris berikut dan juga upload ke /tftpboot. Karena mac address ip phone Cisco 3911 adalah 001AA11B512A, maka nama filenya adalah SEP001AA11B512A.cnf.xml.
[stextbox id=”grey” mode=”css” shadow=”false” color=”FFFFFF” bgcolor=”000000″]
<device xsi:type=”axl:XIPPhone” ctiid=”1566023366″>
<deviceProtocol>SIP</deviceProtocol>
<devicePool>
<dateTimeSetting>
<dateTemplate>D-M-YA</dateTemplate>
<timeZone>Arabian Standard Time</timeZone>
<ntps>
<ntp>
<name>172.16.1.16</name>
<ntpMode>Unicast</ntpMode>
</ntp>
</ntps>
</dateTimeSetting>
<callManagerGroup>
<members>
<member priority=”0″>
<callManager>
<ports>
<ethernetPhonePort>2000</ethernetPhonePort>
<sipPort>5060</sipPort>
<securedSipPort>5061</securedSipPort>
</ports>
<processNodeName>172.16.1.16</processNodeName>
</callManager>
</member>
</members>
</callManagerGroup>
</devicePool>
<sipProfile>
<sipProxies>
<backupProxy></backupProxy>
<backupProxyPort></backupProxyPort>
<emergencyProxy></emergencyProxy>
<emergencyProxyPort></emergencyProxyPort>
<outboundProxy></outboundProxy>
<outboundProxyPort></outboundProxyPort>
<registerWithProxy>true</registerWithProxy>
</sipProxies>
<sipCallFeatures>
<cnfJoinEnabled>true</cnfJoinEnabled>
<callForwardURI>x-cisco-serviceuri-cfwdall</callForwardURI>
<callPickupURI>x-cisco-serviceuri-pickup</callPickupURI>
<callPickupListURI>x-cisco-serviceuri-opickup</callPickupListURI>
<callPickupGroupURI>x-cisco-serviceuri-gpickup</callPickupGroupURI>
<meetMeServiceURI>x-cisco-serviceuri-meetme</meetMeServiceURI>
<abbreviatedDialURI>x-cisco-serviceuri-abbrdial</abbreviatedDialURI>
<rfc2543Hold>false</rfc2543Hold>
<callHoldRingback>2</callHoldRingback>
<localCfwdEnable>true</localCfwdEnable>
<semiAttendedTransfer>true</semiAttendedTransfer>
<anonymousCallBlock>2</anonymousCallBlock>
<callerIdBlocking>2</callerIdBlocking>
<dndControl>0</dndControl>
<remoteCcEnable>true</remoteCcEnable>
</sipCallFeatures>
<sipStack>
<sipInviteRetx>6</sipInviteRetx>
<sipRetx>10</sipRetx>
<timerInviteExpires>180</timerInviteExpires>
<timerRegisterExpires>3600</timerRegisterExpires>
<timerRegisterDelta>5</timerRegisterDelta>
<timerKeepAliveExpires>120</timerKeepAliveExpires>
<timerSubscribeExpires>120</timerSubscribeExpires>
<timerSubscribeDelta>5</timerSubscribeDelta>
<timerT1>500</timerT1>
<timerT2>4000</timerT2>
<maxRedirects>70</maxRedirects>
<remotePartyID>false</remotePartyID>
<userInfo>None</userInfo>
</sipStack>
<autoAnswerTimer>1</autoAnswerTimer>
<autoAnswerAltBehavior>false</autoAnswerAltBehavior>
<autoAnswerOverride>true</autoAnswerOverride>
<transferOnhookEnabled>false</transferOnhookEnabled>
<enableVad>false</enableVad>
<stutterMsgWaiting>1</stutterMsgWaiting>
<callStats>false</callStats>
<silentPeriodBetweenCallWaitingBursts>10</silentPeriodBetweenCallWaitingBursts>
<disableLocalSpeedDialConfig>false</disableLocalSpeedDialConfig>
<startMediaPort>16384</startMediaPort>
<stopMediaPort>32766</stopMediaPort>
<sipLines>
<line button=”1″>
<featureID>9</featureID>
<featureLabel>0011</featureLabel>
<proxy>172.16.1.16</proxy>
<port>5060</port>
<name>8047</name>
<displayName>8047</displayName>
<autoAnswer>
<autoAnswerEnabled>2</autoAnswerEnabled>
</autoAnswer>
<callWaiting>3</callWaiting>
<authName></authName>
<AuthUserName></AuthUserName>
<authPassword></authPassword>
<sharedLine>false</sharedLine>
<messageWaitingLampPolicy>1</messageWaitingLampPolicy>
<messagesNumber>*97</messagesNumber>
<ringSettingIdle>4</ringSettingIdle>
<ringSettingActive>5</ringSettingActive>
<contact>0011</contact>
<forwardCallInfoDisplay>
<callerName>true</callerName>
<callerNumber>false</callerNumber>
<redirectedNumber>false</redirectedNumber>
<dialedNumber>true</dialedNumber>
</forwardCallInfoDisplay>
</line>
</sipLines>
<voipControlPort>5060</voipControlPort>
<dscpForAudio>184</dscpForAudio>
<ringSettingBusyStationPolicy>0</ringSettingBusyStationPolicy>
</sipProfile>
<webAccess>1</webAccess>
<loadInformation>SIP3951.8-1-4a</loadInformation>
<capfAuthMode>0</capfAuthMode>
<capfList>
<capf>
<phonePort>3804</phonePort>
</capf>
</capfList>
<certHash></certHash>
<encrConfig>false</encrConfig>
</device>
[/stextbox]
- Set DHCP server dengan opsi 150 dan diarahkan ke server IP PBX untuk tftpserver.
- Karena IP phone Cisco 3911 tidak bisa menggunakan username dan password, tambahkan ekstensi 8047 langsung ke sip_custom.conf:
[stextbox id=”grey” mode=”css” shadow=”false” color=”FFFFFF” bgcolor=”000000″];Cisco IP PHone 3911
[8047]
deny=0.0.0.0/0.0.0.0
secret=
canreinvite=no
context=from-internal
host=dynamic
type=friend
nat=yes
port=5060
qualify=yes
transport=udp
pickupgroup=
dial=SIP/8047
mailbox=8047@device
permit=0.0.0.0/0.0.0.0[/stextbox]
- Edit extensions_custom.conf di bawah context [from-internal-custom] tambahkan baris:
[stextbox id=”grey” mode=”css” shadow=”false” color=”FFFFFF” bgcolor=”000000″];cisco 3911
exten => 8047,1,Dial(SIP/8047,30)[/stextbox]
- Setelah klik Save dan Reload Asterisk, cabut dan nyalakan perangkat ip phone Cisco 3911. Jika berhasil, maka ip phone bisa digunakan untuk menelpon dan juga ditelpon.